This article describes the steps to configure SSO between Azure AD and WordPress using miniOrange’s SSO plugin. Most of the contents are following official configuration guide of MiniOrange’s guide video:
https://plugins.miniorange.com/saml-single-sign-on-sso-wordpress-using-azure-ad
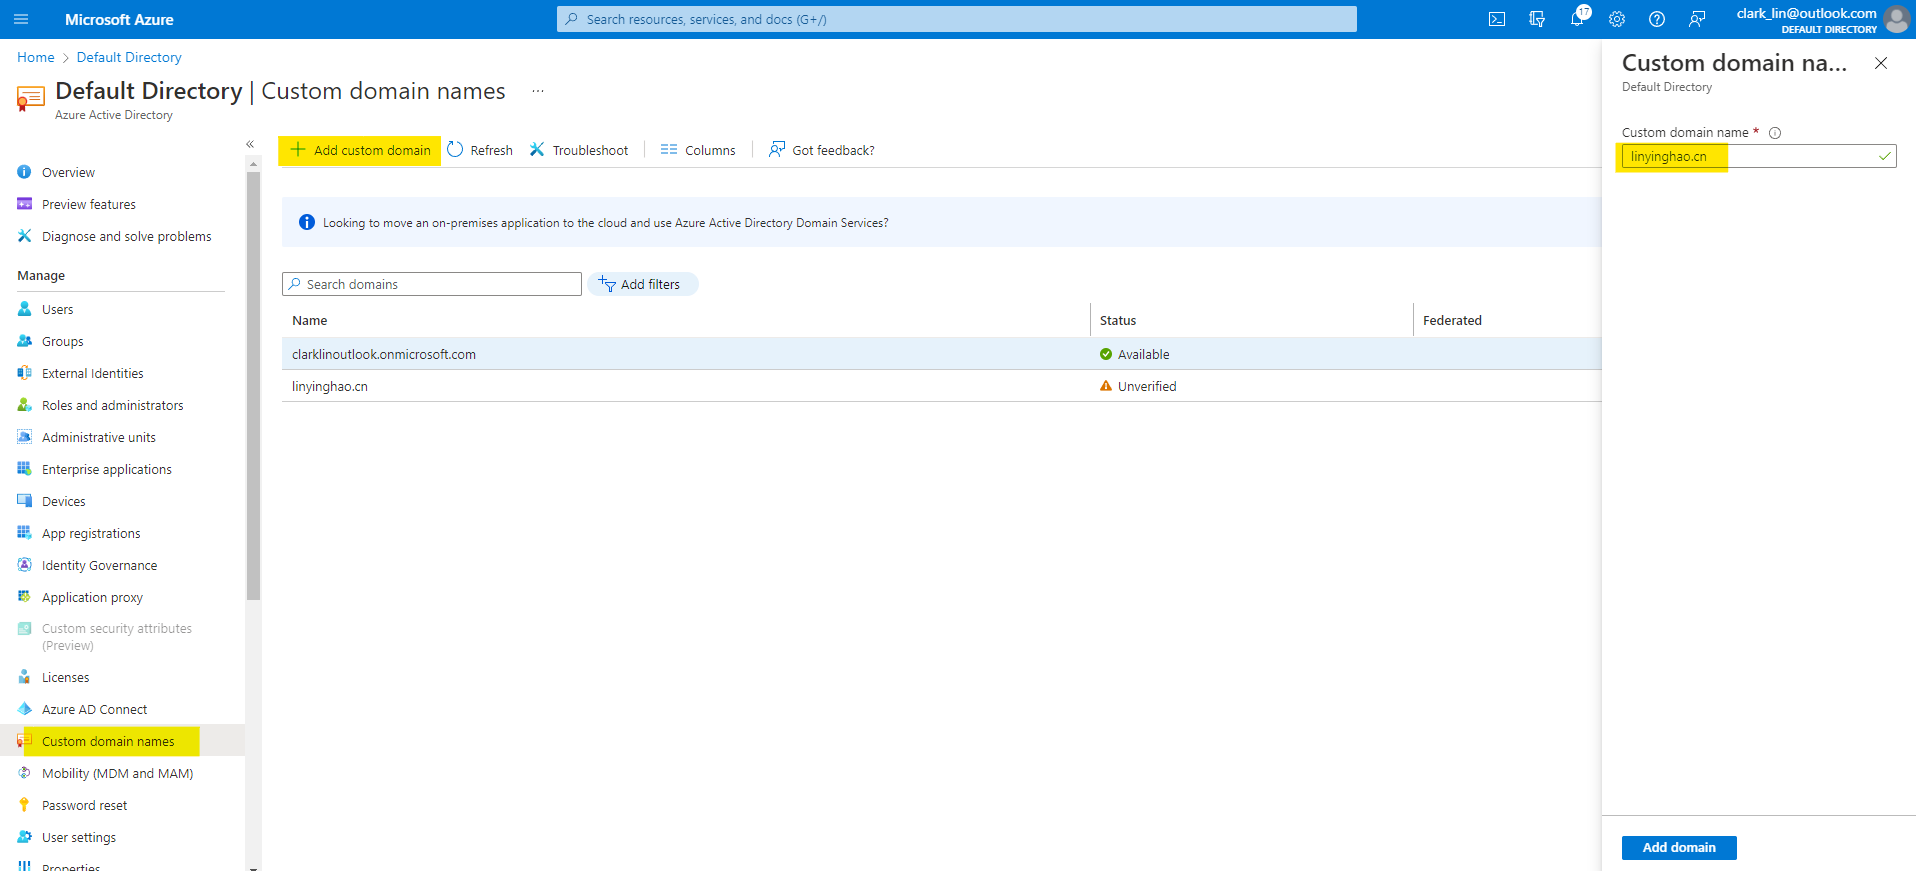
Add wordpress’s domain as custom domain in Azure AD (Optional)
This is optional if domain of wordpress is previously registered in Azure AD as custom domain.
Add Custom Domain
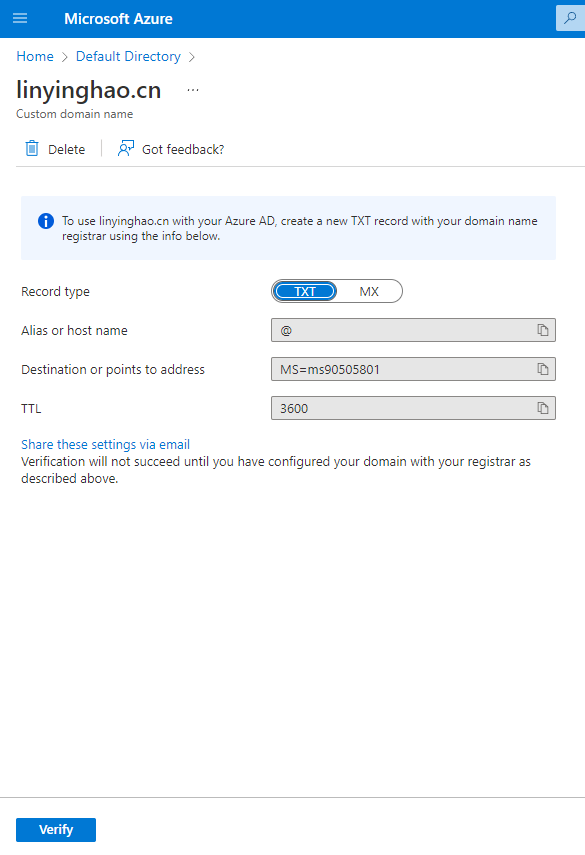
Set Domain Parse Record for Azure AD’s Verification

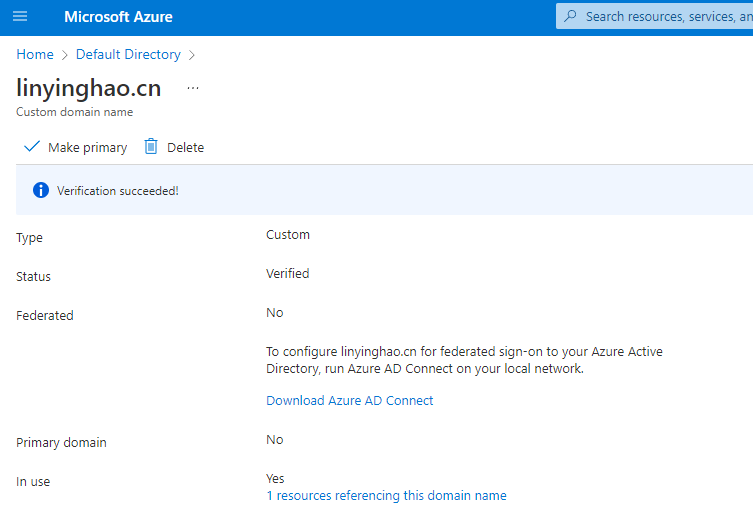
Verify Custom Domain
Configure SSO
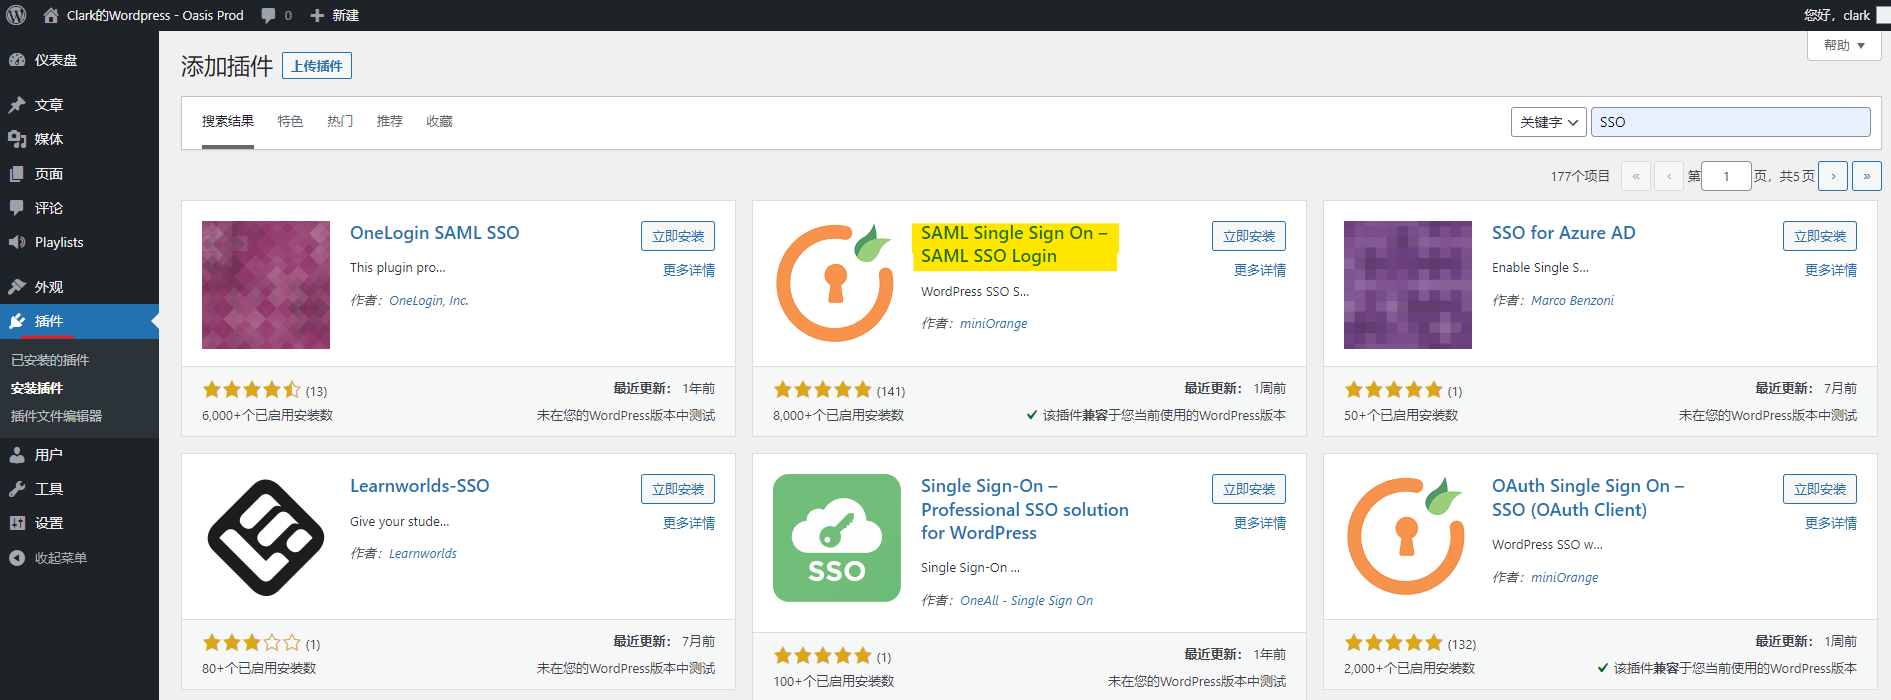
Install SSO Login Plugin
Here we choose the most popular plugin “SAML Single Sign On – SAML SSO Login”. Install and enable the plugin.
Download SP metadata from wordpress
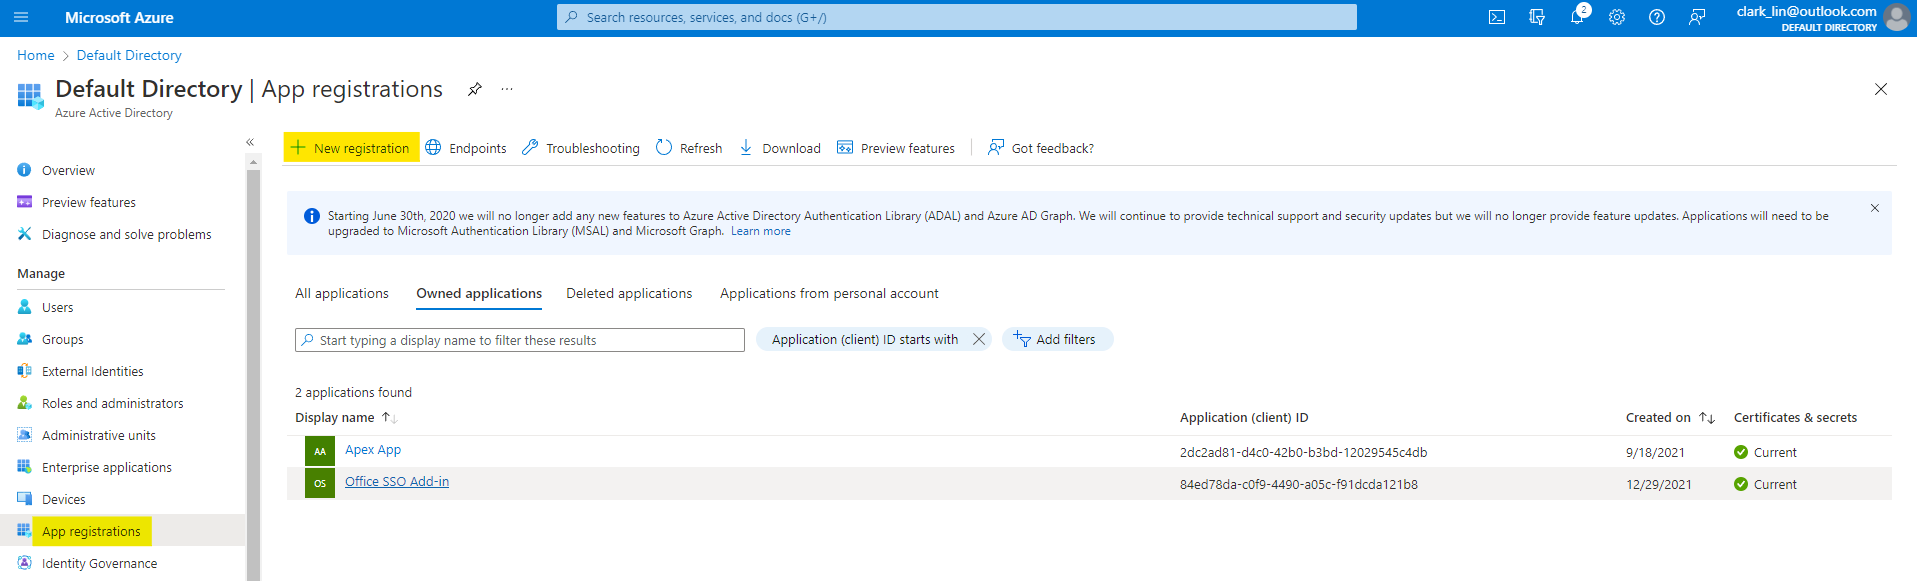
Create WordPress Application in Azure AD through App Registration
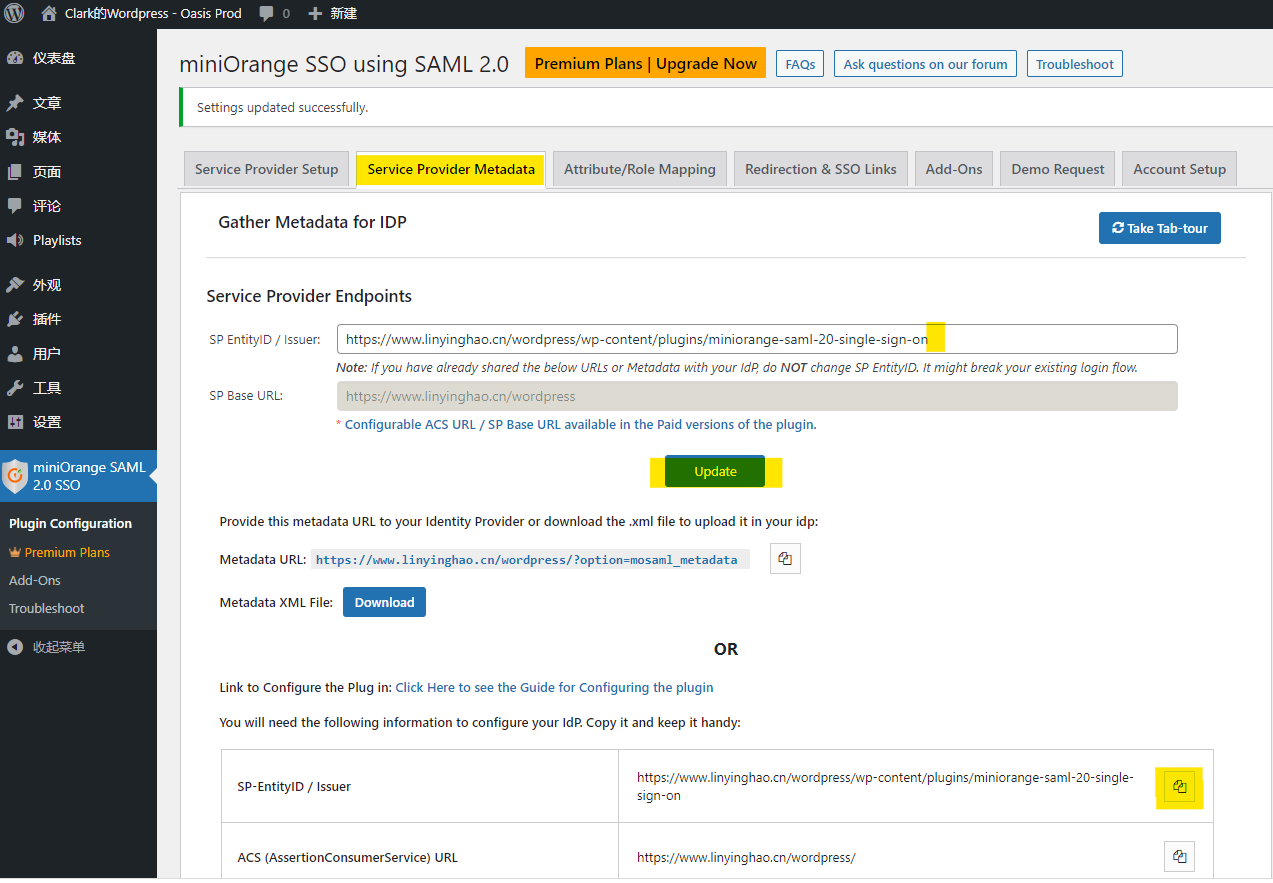
Go to miniOrange SSO plugin’s Service Provider Metadata tab, remove tailing “/” in SP EntityID / Issuer field, and click “Update”, and copy SP-EntityID / Issuer.
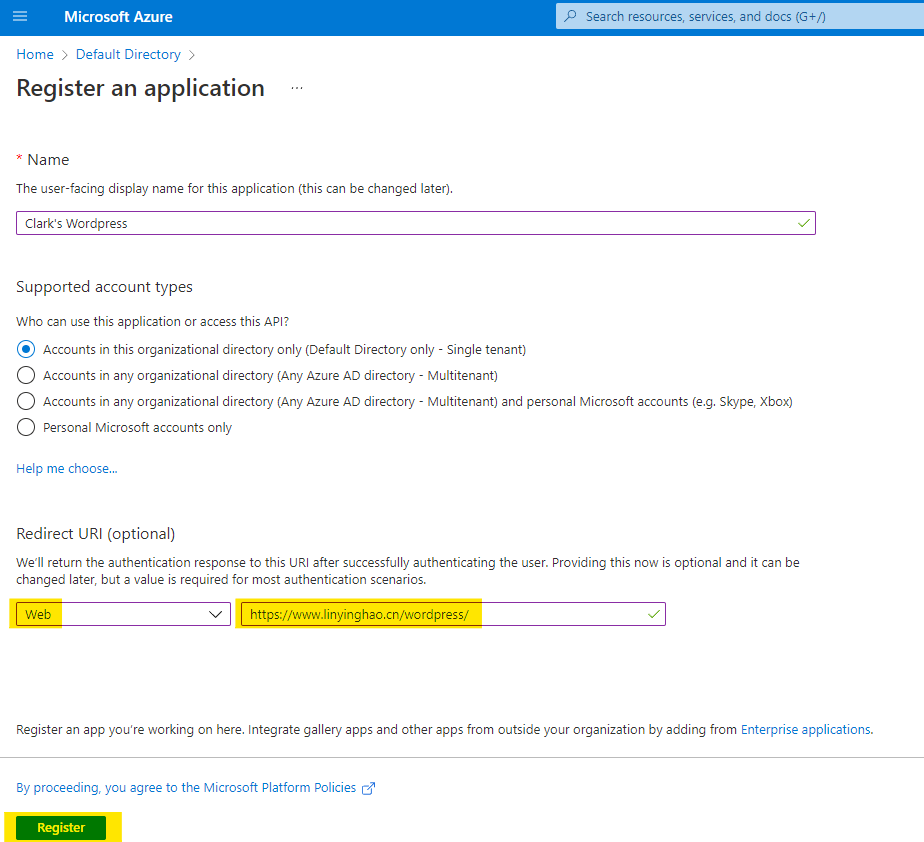
Modify App ID URI of Azure AD application
Go back to Azure AD application, paste “SP-EntityID / Issuer” to App ID URI.

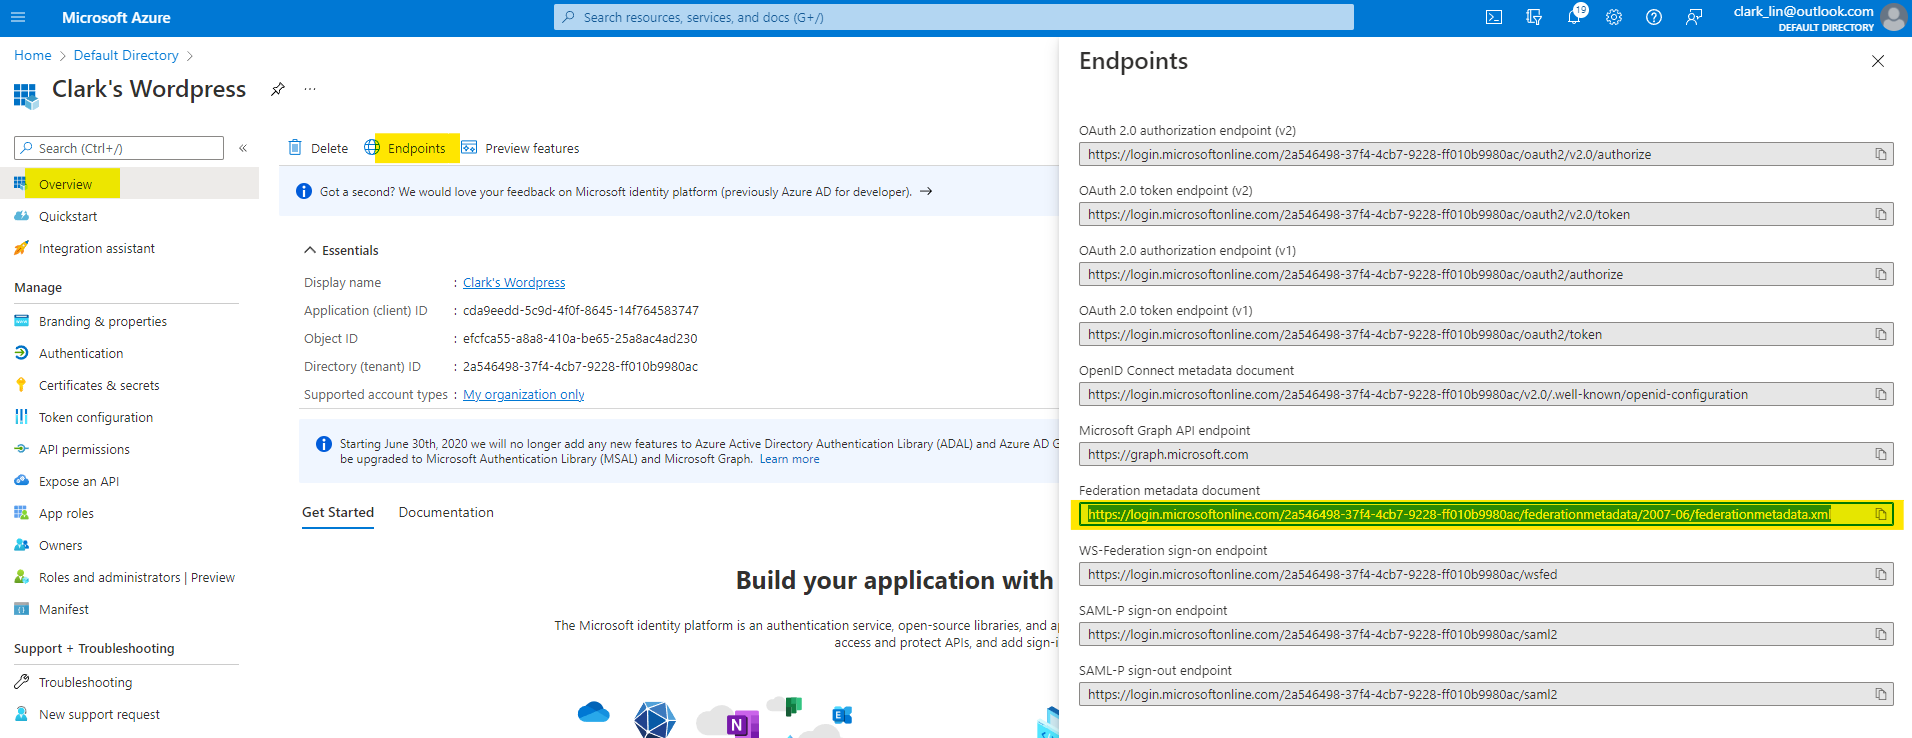
Go to endpoint and copy Federation metadata document
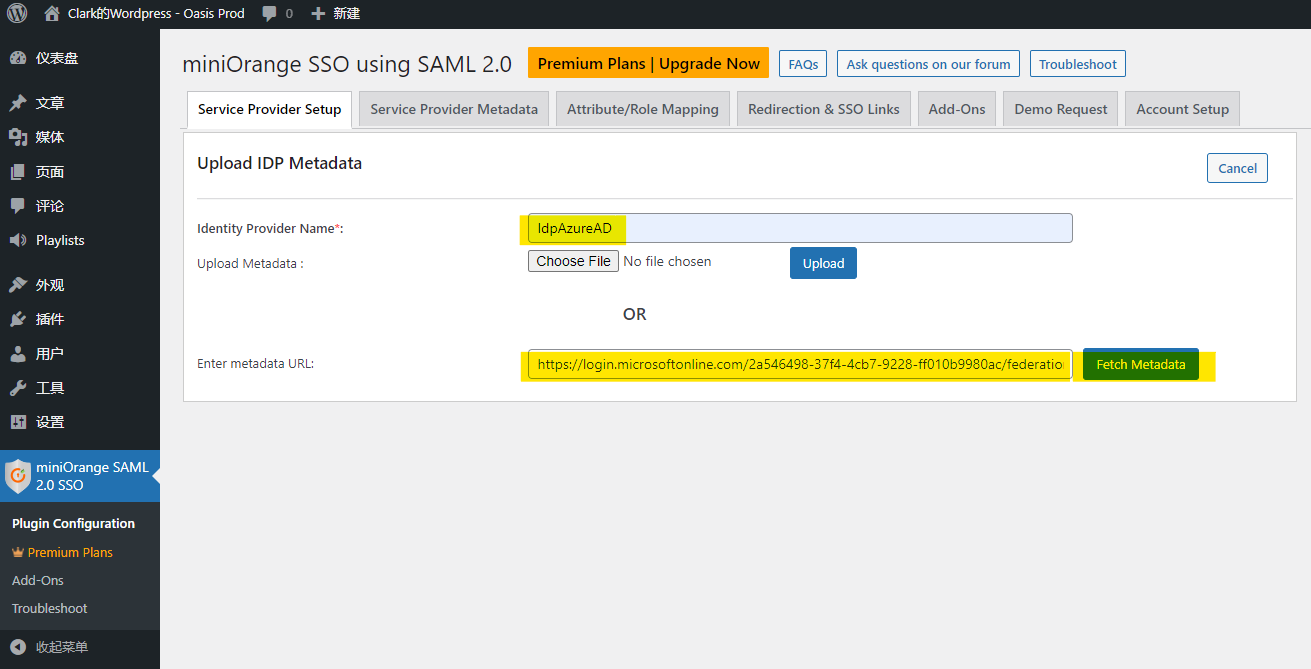
Fetch Azure AD metadata in WordPress Plugin
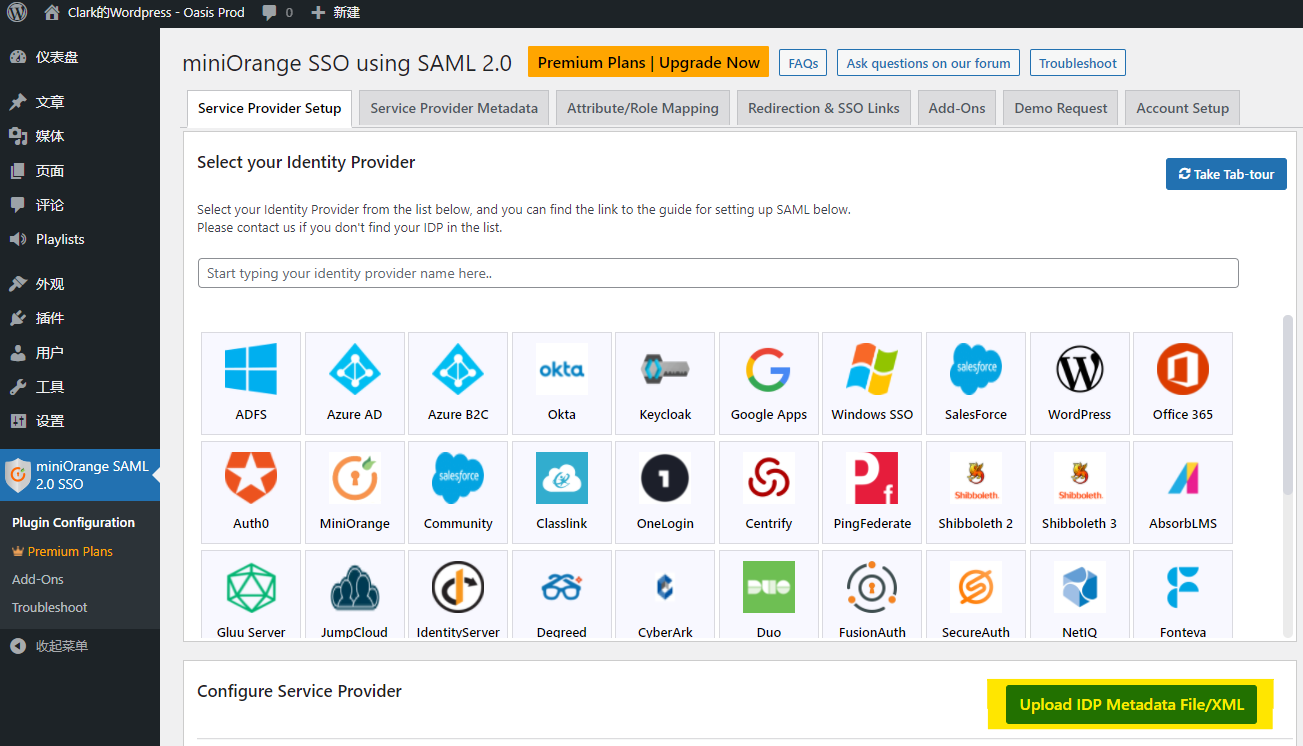
Go to wordpress plugin, in Service Provider Setup tab, click Upload IDP Metadata File/XML
Past Azure AD Federation metadata document URL, and click Fetch Metadata
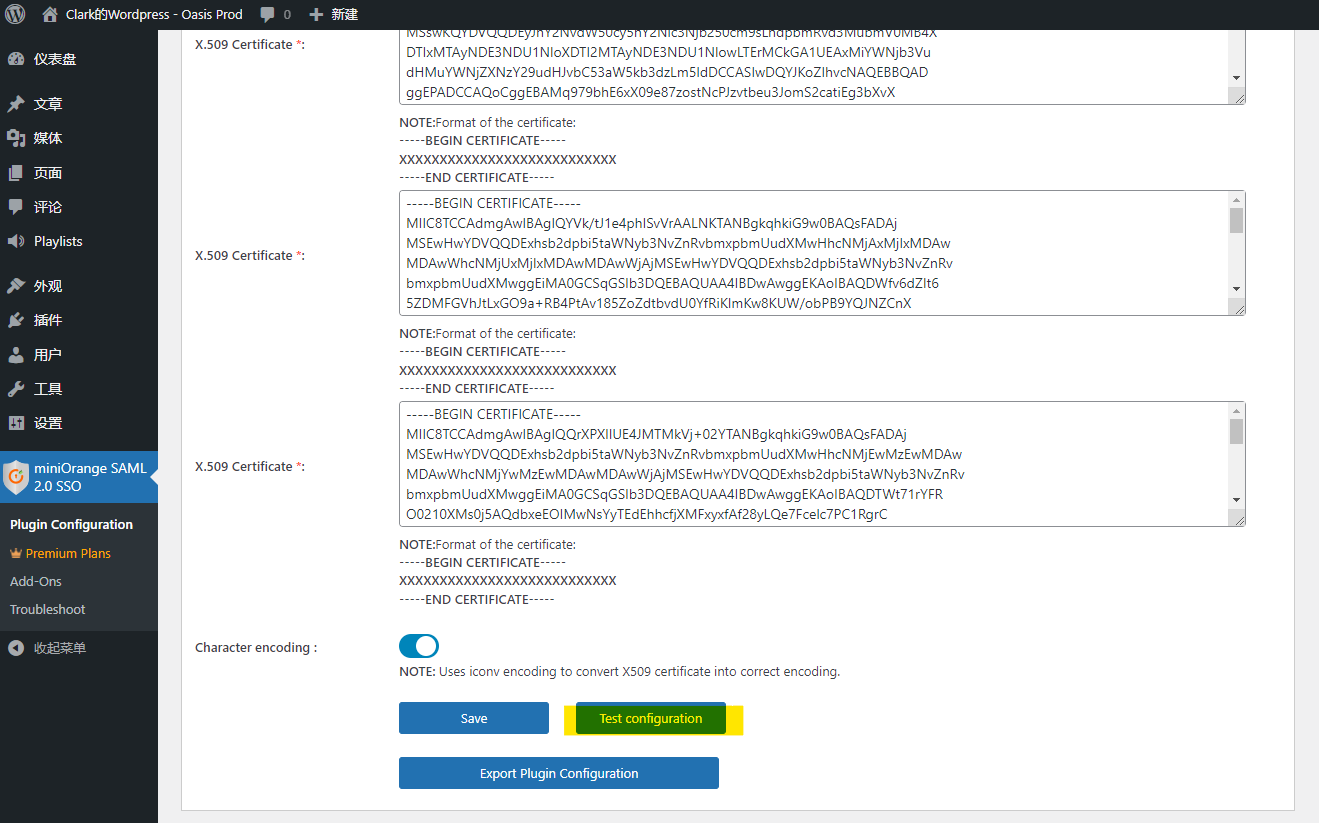
Test Configuration

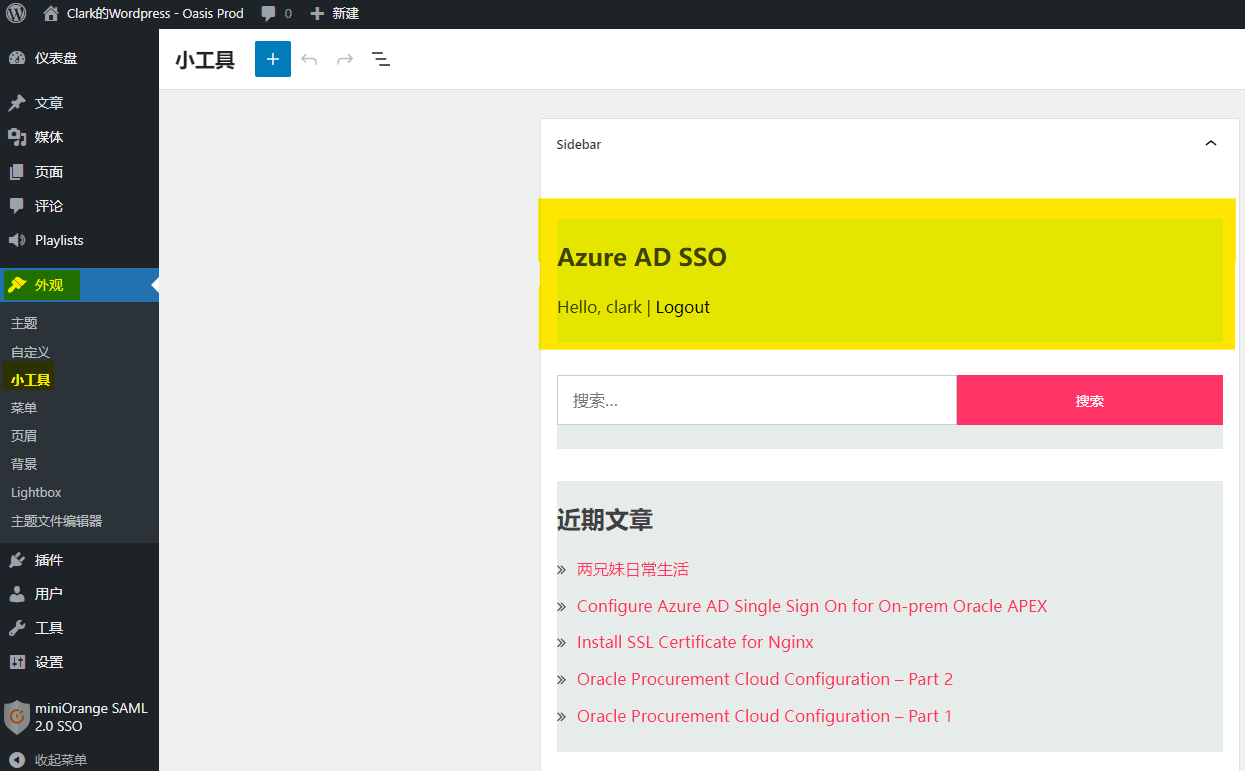
Add SSO Widget in Page